Howdy, Saturday: Texas Sheet Cake
March 19, 2011 § 2 Comments
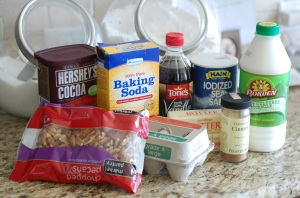 Today is my friend’s birthday, and being a fellow native Texan, nothing says happy birthday like a Texas Sheet Cake. If you’ve never had this, you’re in for a treat. This was a staple in our family growing up. I remember my aunts making it quite often, and my grandmother, too. If there was a family event, this was the go-to dessert since it takes only an hour, uses ingredients almost everyone has in the pantry already, and it’s baked and served right out of a jelly roll pan.
2 sticks butter
4 tablespoons cocoa powder (I used Special Dark)
1 cup boiling water
2 cups sugar
2 cups all-purpose flour
1/4 tsp. salt
1/2 cup buttermilk (or make your own with the ole milk + vinegar trick)
2 eggs
1 tsp. baking soda
1 tsp. vanilla
1/2 tsp. cinnamon
(See below for frosting ingredients.)
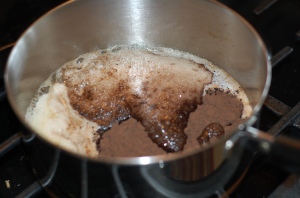 In a sauce pan over low heat, melt two sticks of butter. When they’re almost completely melted, add 4 tablespoons of cocoa powder and stir. When combined, add your boiling/hot water. Let mixture bubble together for a few seconds and then set aside.
 In a large bowl, combine your sugar, flour, and salt. Once combined, add in the chocolate mixture from the sauce pan. Get ready to work your spatula. You could use an electric mixer, but there’s really no need with this recipe.
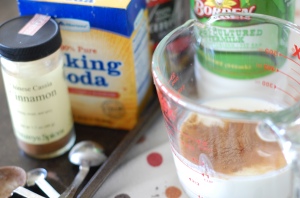 In a measuring cup, combine the 1/2 cup of buttermilk with 2 eggs, 1 tsp. of baking soda, 1 tsp. vanilla, and 1/2 tsp. cinnamon. Whisk together and then pour into batter, combining all the ingredients with a spatula.
 Once the batter is thoroughly combined, pour it into a greased pan. The pan I used was a deep cookie sheet, or jelly roll pan by Wilton. You can find industrial baking sheets to use, but most cookie sheets will work as long as they are deep enough. You only want your batter to fill it up about half way.
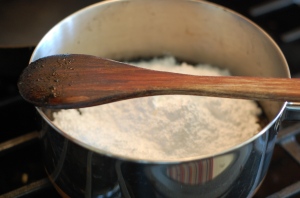 While your cake is baking at 350 for about 25 minutes, you will start your frosting. This is basically like starting the recipe over again.
1 3/4 sticks butter
4 tablespoons of cocoa powder
6 tablespoons of milk
1/2 a bag of powdered sugar (about 1 pound)
chopped pecans (I used about 2/3 cup)
 Melt your butter in the sauce pan and add the cocoa powder. When this is starting to simmer, add in the milk, and let bubble a few seconds before removing from heat. Add in the powdered sugar–I did this in two parts so that you can get it good and combined and decide if you need to add more or less. Once combined, add in pecans.
 Never again will you see this direction here, but do not let the cake cool–pour the icing onto the cake when it comes out of the oven so that it’s warm and will allow the icing to spread in a thin layer over the top. Try to resist licking your fingers.
Cool it, wrap it up, and be sure you have some Blue Bell on hand. Sing happy birthday and cut into the cake!
Lots of starting going on
March 15, 2011 § Leave a comment
 These days it feels like I’m doing a lot of starting and not a lot of finishing. Hence the lack of cute finished projects to tell you about. So, in the meantime, I thought I would just share this teaser pic. Cute towels, huh? These can be picked up at antique stores for next to nothing–between $1-$3 a piece. Now that’s not a steal in terms of fabric, but they all have embellishments on them already–from handmade lace to little touches of embroidery, you can usually find some pretty special little pieces if you have your digging game face on. I have an idea for what to do with these, but I’m not sure about execution. I’m working on a pattern based on a tiny person item that I have already. Hopefully I’ll have something to show for this effort soon.
In other finds, we have vintage feed sack material and cute antique pillow cases. Again, both can be found for really reasonable prices at antique stores if you have your eyes peeled. After sewing for King Baby Boy, I need to get a little girl sewing out of my system, and that’s what these are supposed to help me with! Stay tuned–hopefully we can get a few little projects wrapped up before Baby Mac makes his debut.
A stitch of thanks
March 13, 2011 § Leave a comment

While I was over here telling you about my whale thank you notes, sweet Aunt Peggy was whipping up her own version on her machine! Pretty funny, huh? She used a number 8 needle, some little triangle scraps, blue and gold top thread, and white bobbin thread to create these sweet cards. She has a new Bernina, and she was able to create these out of the scraps left from the pennant that they made for the shower. I’ve had a great time filling them in this week and am just in awe of the cute little, “Thanks” stitched at the bottom of each one. So break out the card stock…everyone’s doing it.
My cup runneth over
March 8, 2011 § 1 Comment
 The amazing and talented women in my family threw a shower for Baby Mac this weekend, and it was just amazing. I’m even going as far as to say it could rival anything I’ve seen put together over at Hostess with the Mostess–which if you haven’t checked out, is full of great inspirational party ideas for just about any occasion. Anyway, they took the whales and gathered his friends from under the sea and across the jungle to create the sweetest tables and filled them with an amazing menu. Here’s a little glimpse of their creativity.
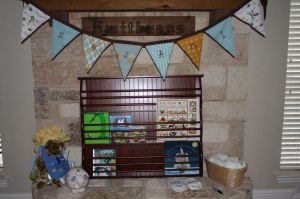 They made this too-cute pennant from all the fun fabrics in Baby Mac’s room, and then they stitched his name on it–so sweet. I’m planning on hanging this over his closet doors in the nursery. And, that’s a bookshelf that they filled with the sweetest children’s books. They asked the guests to bring a book as part of their gifts to get our little guy’s library started. Lots of special books came our way.
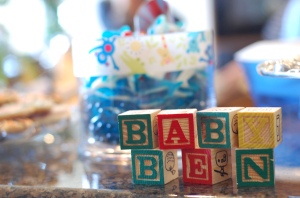 They had all sorts of great vintage toys throughout the room. From blocks to stick horses to stuffed animals that I played with as a little girl. There were mementos of both my and the husband’s childhood throughout the room.
 Uber-talented Aunt Lisa made these cute animal cookies. Frosted animal cookies have always been a favorite, but these went to a whole new level. They were a huge hit, especially with some of the little ones who joined us.
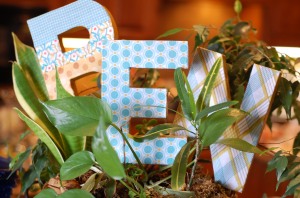 Again with the sweet fabrics, this was a great way to make use of some of the scraps I had from his quilt. Aunt Peggy and Aunt Kim asked that I save them some of the pieces I wasn’t able to use. When I handed over my little bag of odds and ends, I never expected that something so darling would become of them. And such a cute idea to put them in a plant! These will also take up residence in his room.
 Did I mention the food? It was everywhere–and so great. The Aunts got together and made all of my favorite cupcakes: carrot cake, German chocolate, and red velvet. All of them were amazing–the carrot and red velvet both topped with a great cream cheese frosting. I had to split them so that I could sample each one, and my coworkers had a great Monday devouring the left overs that I brought in. The sweet little animal toppers were so colorful, and the cute wrappers really made a statement.
 And, if you didn’t get a chance to sample all of them at the shower, they made these cute cupcakes-to-go baked in mason jars for the guests to take home. So clever! I know it seems like I’m gushing here, but I was so blown away by all of the cuteness and hard work.
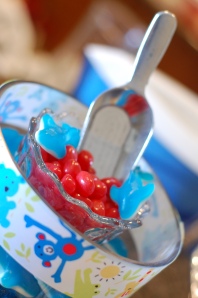 Lessons learned: It’s really touching to know that Baby Mac will have so many amazing people in his life, and that they’ve all gone to such effort to make his welcoming party so special. A special thanks to the lovely ladies in Cheyenne, Oklahoma who sent the cutest blanket to Baby Mac. I’m jealous of your mitered corners, and I love the fabric! (They sent a sweet white and yellow light-weight blanket perfect for Texas summers!) And for everyone who made the effort and made the day so bright and memorable, you’ve touched my heart.
A whale of a thank you
February 27, 2011 § Leave a comment
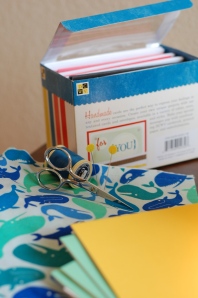 My very dear, very sweet, girlfriends threw Baby Mac a shower this weekend. They went with a whale theme to match the bedding that I love for his cradle, and they did a bang up job. From the adorable invitations, to the amazing menu (cucumber mint sandwiches, lemon blueberry scones, spiced cheese twirls, turkey and cranberry sandwiches, lemon cupcakes, the list goes on!), to the cute blue punch, these ladies know how to do something cute yet sophisticated. I knew last weekend that this was going to be a day filled with love, and I wanted to show my appreciation with cards that really sent a big thanks! Enter my new favorite scrap project.
A box of blank cards from Hobby Lobby, a pair of tiny scissors, and the left overs from my scrap pile of the cute whale fabric got me started making these too-cute thank you cards. 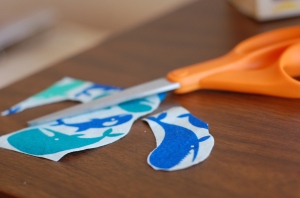 I started by cutting out the whales from the scraps–what began with cutting one whale out at a time morphed into clipping out sections and little schools to get some creative cuts. Then I threaded my bobbin with white and used a bright blue for the top stitch. This way, the white stitches would be on the white inside of the cards.
 I then just positioned the whales onto the front of the cards how I liked them best, and stitched around them, backstitching at the beginning and ending to hold them in tact. This requires you to go a little slow, but there’s a lot of freedom. They can look a little wonky, and the stitching doesn’t have to be exactly at the edge. At least not for me–I think the off-center nature of this project adds to the charm. Some whales fit better in a corner, while others were fun across the middle.
 Then I took cute little white tags and came up with some fun whale-inspired thank you tags–Thanks a TON!, A whale of a thanks!, etc.–and placed those on the cards as well. I used some additional colored backing paper and a zig zag stitch to hold the tags in place and add some additional color to the front.
 I don’t know if it’s the hormones or just how fun this was to make, but I really love these little notes! They were so fun, and I’ve had a great time today filling them in for all the special ladies in King Baby’s fan club who turned out yesterday to help us get ready for his arrival. We had a great time, and I hope the thank yous show it!
Happy Chinese New Year: Orange almond cookies
February 19, 2011 § 1 Comment
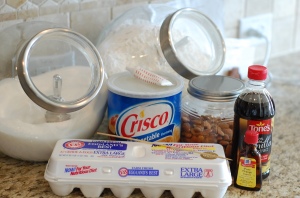 So, as you can tell, I’m behind on my blogging. Not really sure what happened, but it’s time to catch up! Chinese New Year dinner with friends called for a cookie, so to the Internets we went. I found a really great recipe for Almond Cookies that sounded pretty traditional here. The recipe sounded easy and is a great example of things you can do with stuff you probably already have in your cabinet.
I actually am not the biggest almond extract fan–something about it is too sweet for me, so I put my own spin on this one and substituted orange extract where she used almond.
 1 cup + 3 tablespoons shortening
1 cup sugar
1 egg
2 teaspoons orange extract
2 1/2 cups all-purpose flour
1/2 teaspoon baking soda
1/4 teaspoon salt
You’ll also need some almonds. Start out by preheating the oven to 350 degrees and lining your cookie sheet with parchment paper. Toast your almonds in a single layer for about 8 minutes to bring out their flavor.
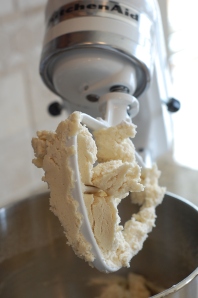
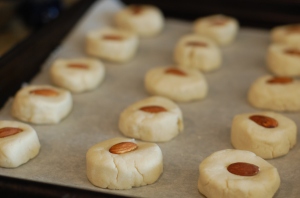 Mix your shortening and sugar in the mixer until light and fluffy. Beat in the egg, and orange extract. (I actually wish that I had some oranges, because a little zest would have been great).
Sift flour, baking soda, and salt in a medium bowl, and then gradually add this to your wet ingredients. I did this about 1/2 cup at a time. The mixture will start pulling together, but this will be a very dense dough and a little drier than most cookies, typical for shortbread recipes.
 Now for the fun part–forming the cookies. I took a little liberty with this, and formed mine like you would a hamburger patty, flattening around the edges and kind of smoothing down the top and bottom after you form the ball. Place an almond on the top of each one. Isn’t this the most perfect cookie you’ve ever seen? So pretty.
 Bake for 15-18 minutes like the original recipe advises and then let them cool on a cooling rack. These are really great right out of the oven!
New art and a coupon
February 18, 2011 § Leave a comment
 New artwork for the living room has finally been found! My obsession with Etsy has continued, and I found a really great shop there called Modern Botanical that has these stunning botanical sun prints. They combine a type of photography called camera less, which I’m pretty sure is like photogram, to expose the shape of these natural flowers and plants on photo paper to get the natural shape, and then she digitizes it to add color. The process, the paper, the unique colors all caught my attention and I knew that they had to come live with me.
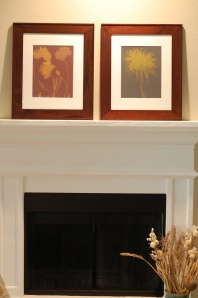 She has lots of great ones to choose from, but I went with the mum and poppies. Continuing to support the Aaron Brothers penny sale, I picked up these great frames, and ta-da–new art! The Etsy seller, Trinity, was so kind and professional. She even sent me a coupon code to share with family and friends who might also want to order from her! If her stuff speaks to you, too, just enter REPEAT15 as the coupon code to get 15% off. Pretty sweet,huh?
A tote bag for baby
February 9, 2011 § 1 Comment
 Or rather, a tote bag for Mother-in-law’s birthday that she’ll probably use for the baby. She’ll be keeping him in the fall (hallelujah for family close by!), so I thought it would be nice for her to have her own bag for Baby Mac. Fun, huh? This is the project that I worked on with the Heather Bailey fabric that’s so cute–it’s down the middle and along the handles. There are a couple of other fabrics in here, but I didn’t look up the names–I picked them up during the City Craft sale a couple of months ago. And, this is the first big project I’ve done using oil cloth–I used it for the lining.
 The weekend tote pattern in Heather Ross’ Weekend Sewing book was oh-so-easy it didn’t even take the whole weekend! In fact, I think that we got this churned out in about four hours, start to finish! I started by stitching the three different fabric panels together that I wanted to use for the bag, and then cutting the pieced fabric along the pattern lines.
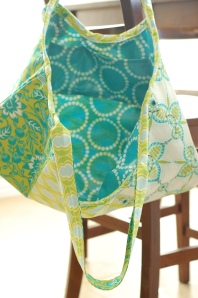 I went with the oil cloth lining on the bag thinking that between bottles, wet wipes and other baby necessities, something is bound to spill in there. I figured it would be easier to wipe it out that way, and I just loved the big blue dots, and the bright color.
 To add a little jazz to it, I made my first yo yos with Heather Bailey’s tutorial, and stitched them on the front just under the handle. Nothing says love like some hand stitching–it’s probably my least favorite thing to tackle, so I machine stitched the outer edges on a long stitch length and set the machine to a gather stitch so it skips every other one. Seemed to work fine, but you have to go slow.
 Lessons learned: This was actually an easy enough project with such a fun outcome, that I think I’ll definitely be making it again. Who doesn’t like a tote bag, right? I will be revisiting how I made the binding and the handles. The pattern and instructions said to use the lining material, but after doing that for the binding, I switched it up on the handles because the oil cloth was just bulky for at part. It made it sturdy, but was probably unnecessary. Also, I think that I’ll add more interior pockets next go around. This one has a pocket that I sized for an iPhone compartment, and a miscellaneous compartment, but I think it could use one on each side. Other than that, this book is proving to be a great little find!
Crib bumpers, check
February 7, 2011 § 3 Comments
 They’re done! They’re done! Praise the Lord. What started out with innocently reading a few tutorials and a trip to the fabric store, turned into the two-month project. I give you, crib bumpers. Or rather, I give them to King Baby, as he’s being called these days.
 So the deal is that I didn’t really like any of the bedding I was seeing at stores, and I’ve already told you that the blue/brown craze isn’t for me, so when I saw the Sew4Home tutorial, I thought, “Oh, this doesn’t look too hard.” And, really, it wasn’t. If a crib only needed one or maybe two bumpers, this would have been a snap. But getting from two, then to four, then finishing the final fifth and sixth bumpers was kind of a stretch. Some would have hunkered down and churned ’em out in a weekend, but I found myself distracted after a couple of hours, so this took me much longer than I thought it would.
 But, and this is a big but, I’m kind of in love with them. I adore these fabrics–which, you’ll be impressed to know I actually have the names of now. City Weekend Tree Top Yellow Gold, from Moda, is the cute blue, yellow, red leaf pattern that makes up the cording, the ties, and I used it on the binding for the quilt. The plaid and the dots are both from Joel Dewberry’s Modern Meadow Collection in the Sunny Day Palette. The dots are Acorn Chain Pond and the plaid is Picnic Plaid Sunglow–even the names sound happy.
 Lessons learned: Even if a tutorial looks easy, you must consider how many of each you will need. For example, I hate making those little tubes that you have to turn inside out to form the ties. I cheated and did these a little differently once I realized that I would have to make and turn 24 of those annoying finger-trap pieces. Not. Happening. Also–it’s okay to trim. I realized that my bumpers were all slightly larger than the finished size of my sewn covers. I just trimmed the batting on either side by 1/4 inch–it wasn’t a product of the covers being sewn incorrectly, the bumper filling just had to be trimmed to fit in them snugly without looking cramped. Lastly, I learned how to make cording, and how to stitch a cover up over an insert. Both were easier than I thought they would be, but pinning is not optional for this project. You must do it. There’s not another option.
 Before I let you go, here’s a shout out to the fabulous Grandma Amy. Isn’t the horse pillow just the most amazing thing ever? This is one of many great pieces that she’s shared with our family. A true artist, and the talent is evident in all of her work. This is a portrait of a horse made on her sewing machine–yes, with thread, that’s it. Pretty cool, huh? I think that it’s a fun little addition to the crib, especially since the Aquatic Cowboy will be hanging over the crib.
 So, with that done, I think that we’re ready to start pulling all of the pieces together–only one little dresser to finish putting together, and we’re down to the details. You know, like, actually having the baby. But that should be a snap, right?
Stuff I’m lovin
February 6, 2011 § Leave a comment
 This week’s love note to all of the things on the interwebs that I somehow think I need starts with the lovely fabric seen to your left from Heather Bailey. Actually, I love pretty much all of the fabrics in her Nicey Jane series, this just happens to be the one that I picked up. I’m working on a fun project with it, that I’ll share when it’s done.
 Up next, are these cute and yummy sounding cookies from The Kitchn. Our friends invited us over for a belated (thanks Snowgate 2011) Chinese New Year dinner next week, and these are on my radar–hoping I find the time to make them for the festivities. The candied oranges seem a little daunting, but maybe it’s just patience? Right–patience–something I’m great at.
 Just when I think I’ve found all Etsy has to entice me with…. The upcycled jewelry scene seems to be growing, and I love this gift idea. CompassRoseDesign is taking your photos, placing them in vintage ladies watches and then using that as a pendant. How clever! Talk about a really special gift for less than $50.
 Also from the upcycle, reclaimed file comes this collection of fun jewelry from Eco Bling Couture. Fun, and mostly affordable pieces that are just great. My mom had some of my grandmother’s jewelry like this made into crosses that I keep on my buffet, but I’m equally partial to this idea. I like that you can make something totally fun and funky out of things that would otherwise stay in your jewelry box.


